
Master your move with our stress-free apartment move out cleaning checklist schedule. Get your security deposit back without the overwhelm!
The Ultimate Apartment Move Out Cleaning Checklist Schedule to Save Your Sanity (and Deposit)
Look, I get it. Moving is easily one of the most exhausting things you can do. Between packing up your entire life into cardboard boxes, dealing with landlords, and trying to handle your normal 10-hour work shift, the last thing you want to think about is scrubbing a baseboard.
Here is the real talk: leaving your old place dirty is essentially throwing money out the window. Landlords love to find any excuse to hold onto your security deposit, and a dusty ceiling fan or a greasy oven is the perfect excuse for them to hire a “professional service” on your dime.
But you don’t have to panic. At TidyHome.site, we specialize in breaking down overwhelming household chores into bite-sized, achievable routines. By using a structured apartment move out cleaning checklist schedule, you can tackle the deep clean in phases rather than pulling an all-nighter on your very last day. Let’s get your hard-earned money back into your pocket without sacrificing your sanity.
Why a Scheduled Approach Wins Every Single Time
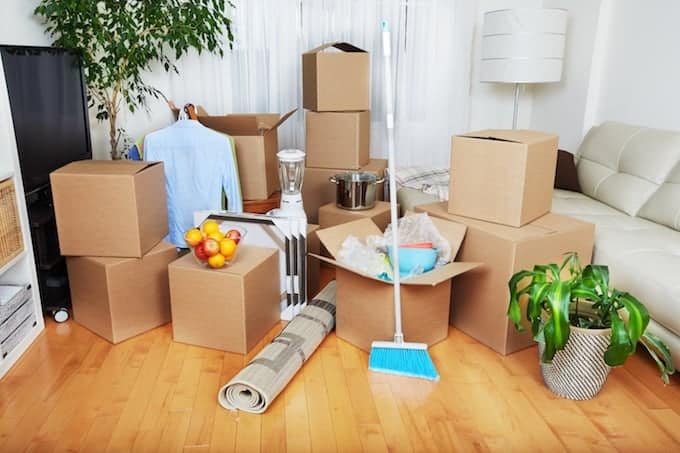
Most people make the mistake of trying to clean their entire apartment on the day their lease ends. That is a recipe for a total meltdown. You are already physically tired from moving furniture, and trying to deep-clean a bathroom at 11:00 PM is going to result in missed spots and a frustrated landlord.
By spreading the work across a multi-day or multi-week schedule, you can focus on one zone at a time. This approach allows you to pack efficiently, clean thoroughly, and actually inspect your own work before the final walkthrough.
The Ultimate Move Out Cleaning Timeline
To make things easy, we have broken down the ideal cleaning timeline. This schedule assumes you start packing a couple of weeks before your official move-out date.
Phase 1: Two Weeks Before Moving (The Pre-Clean)
This phase is all about tackling the areas you don’t use on a daily basis. It’s also the perfect time to declutter so you aren’t moving things you don’t even want anymore.
- Ceiling Fans and Lighting Fixtures: Dust the blades and wipe down the glass fixtures.
- Walls and Baseboards: Wipe down scuffs with a microfiber cloth and warm, soapy water or a magic eraser.
- Windows and Blinds: Clean the inside glass and wipe down the dust from individual blind slats.
- Closets: As soon as a closet is packed, do a quick vacuum and wipe down the shelves. Close the door—you’re done with this section!
Phase 2: One Week Before Moving (The Deep Clean Zones)
Now we are getting into the heavy-lifting zones. These are the rooms that landlords inspect closest because they accumulate the most grime: the kitchen and the bathroom.
- The Oven and Stove: Apply a heavy-duty cleaner and let it sit. Scrub away the burnt-on grease. Don’t forget the crisping drawer at the bottom!
- The Refrigerator and Freezer: Eat through your remaining food, toss expired items, and wipe down every single shelf and drawer. Turn off the freezer and let it defrost if necessary, keeping a towel nearby to catch water.
- Bathroom Tile and Grout: Scrub the shower and tub to remove any accumulated soap scum or mildew.
Phase 3: The Final 48 Hours (The Empty Spaces)
Your boxes are gone, the furniture is loaded into the truck, and the apartment is completely empty. Now it’s time for the final pass.
- Cabinets and Drawers: Wipe out the inside of every kitchen and bathroom cabinet to remove crumbs or spilled toiletries.
- Sinks and Faucets: Polish the fixtures so they shine.
- Floors: Vacuum all carpets and mop every hard surface. Start from the furthest corner of the room and work your way out the door so you don’t step on your own clean floors.
Quick Reference: Cleaning Frequency & Effort Guide
To help you budget your time during this crazy transition, here is a quick breakdown of how much time and effort you should allocate to each zone based on our tried-and-tested apartment move out cleaning checklist schedule.
| Apartment Zone | Recommended Timeline | Difficulty Level | Key Focus Areas |
| Walls & Fixtures | 2 Weeks Before | Low to Medium | Dusting fans, removing wall scuffs, cleaning window tracks. |
| Kitchen Appliances | 1 Week Before | High | Inside the oven, behind the fridge, degreasing the stovetop hood. |
| Bathroom Deep Clean | 3-4 Days Before | High | Soap scum removal, toilet base, grout cleaning, mirror polishing. |
| Cabinets & Drawers | Final 48 Hours | Low | Vacuuming crumbs from drawers, wiping down cabinet faces. |
| Floors & Thresholds | Final Day | Medium | Sweeping patios, vacuuming carpets, mopping out of the front door. |
Step-by-Step Room Guide: Leaving No Trace Behind
Let’s dive into the specifics. When you are standing in an empty room, use this exact checklist to ensure there eyes don’t find a single speck of dust.
The Kitchen Masterlist
The kitchen is often where tenants lose there security deposits. Grease travels far, settling on surfaces you wouldn’t normally think to check.
- The Range Hood: Remove the metal filter and soak it in hot, soapy water with a degreaser. Wipe down the underside of the hood.
- Countertops: Clean out the seams where the counter meets the wall.
- Behind Appliances: If possible, pull the refrigerator and stove away from the wall. You will be shocked at the amount of dust, crumbs, and rogue bottle caps hiding back there.
The Bathroom Sanity Check
Landlords want to see a bathroom that looks completely sanitized.
- The Toilet: Clean the bowl, but also pay attention to the plastic caps at the base of the toilet where dust loves to settle.
- The Exhaust Fan: These fans pull in a massive amount of dust. Use a vacuum attachment to clear out the vents.
- The Mirror: Use a streak-free glass cleaner and a fresh microfiber cloth. Inspect it from multiple angles to make sure there are no smudges.
Bedroom and Living Areas
These rooms are usually the easiest to handle once the furniture is cleared out, but don’t rush through them.
- Outlets and Switches: Light switches are high-touch areas that accumulate oily fingerprints. A quick wipe down makes a massive difference in how clean a room feels.
- Closet Tracks: If you have sliding closet doors, vacuum out the bottom tracks where dirt accumulates.
- Air Vents: Dust the intake vents and replace the HVAC filter if your lease agreement requires you to do so.
Pro-Tips to Streamline Your Moving Shedules
Before you jump into the cleaning process, keep these professional tips from our team at TidyHome.site in mind to save yourself a ton of wasted effort:
Pro-Tip 1: Always Clean Top to Bottom
Never vacuum or mop the floors first. Dust and debris will inevitably fall from ceiling fans, countertops, and blinds while you work. Always start at the ceiling and work your way down to the floor so you only have to clean the floors once.
Pro-Tip 2: Take Photos of Everything
Once your final apartment move out cleaning checklist schedule is complete and the place is spotless, take high-quality photos and videos of every single room, inside the oven, and inside the fridge. This is your insurance policy. If a landlord tries to claim a room was left dirty, you have time-stamped proof to protect your deposit.
Take Control of Your Clean with TidyHome.site
Moving is a major life transition, and it shouldn’t be defined by stress and exhaustion. By breaking down your tasks into a manageable schedule, you can walk away from your old apartment with pride and a full bank account.
If you want to take the guesswork out of home management, we can help. Head over to TidyHome.site to download our free, printable cleaning templates, subscribe to our weekly schedule checklist, or explore customized routines designed to keep your next home completely spotless without the overwhelming stress. Let’s make cleanning feel achievable, one room at a time!